Showing posts with label washable ink pads. Show all posts

Wednesday, June 16, 2010

Finger Print Cards with Washable Ink Pads

In the prior post you saw pictures from Bigfoot's Tie Dye Birthday Party that was lots of fun.

Of course we are doing homemade Thank You cards, so I gave her some suggestions for finger printing the cards. I wrote the word "Thank You" for her to copy on each card and then had her decorate the white card stock any way she liked and then she glued it to the front of the blue card. The only thing I did was cut out the paper for her.

She wrote her name on the inside of the card and I will finish it by writing a personalized note.


Bigfoot is fascinated with the word "toot", so she had to write it on the front of each card. We used the child safe washable ink stamp pads from our collection to make the finger prints and then she used washable markers for making faces and design work.

It was bath night so the dye from the ink pad washed off in the bath. Since she was using several colors on her same finger, it probably would have taken several washings for the ink to come off if it was not bath night.

Try this project with your children and make bookmarks and your own homemade cards.

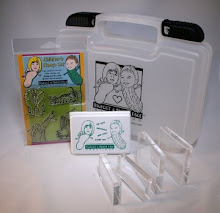
You can visit Bigfoot and Pickle Face's storefront to purchase the washable ink pads. Have fun stamping and crafting with your kids.

Wednesday, November 4, 2009

Rubber Stamping and Scrapbooking Show

Bigfoot & Pickle Face had their first booth at the Rubber Stamping and Scrapbook show that was held at the Waukesha Expo Center on October 24th and 25th, 2009. The show was a lot of fun and I met lots of wonderful people.

If you look closer I stamped Bigfoot & Pickle Face rubber stamps on the table skirt using a Stazon ink pad in Jet Black. Our child safe/washable ink pads would have smeared so I used the Stazon Ink which is designed to stamp on plastic.


So if you are having a themed party, purchase some stamps that depict the theme and stamp onto a plastic table cloth or table skirt. You can find inexpensive table clothes at a dollar store and the table skirts at a party store [table skirts are more expensive]. At Bigfoot & Pickle Face we carry 3 themes in rubber stamps: Circus Act, Fun with Fish and Farm Friends.

We held a drawing for those who visited our booth and Gwen Simons won the drawing. Gwen chose the Farm Kit and Circus Set 1 and I included Washable Tattoo Body Markers and the Cake Slice project I did on a prior blog.

Thank you to everyone who visited my booth and a Big Thank You to those who purchased.

Friday, October 16, 2009

More Shaker Card Fun

Here is another shaker card that I did. This time I cut out a square for my window. This is a great idea for holiday cards and you can use the beads as if they were snow.

Use your imagination and you will be amazed at what you will come up with. Let your child work with you and use their imagination and you will have something you will never be able to re-create :)!


Keep stamping and having fun! All of our stamping products are proudly Made in the U.S.A.

How to make a Shaker Card

All crafts are so much fun to do because it takes you out of your routine and gives you the ability to create. Shaker cards are fun to make and fun to give. This is a very easy and quick project to put together with your child.


First choose and image you want to show through your window. I used from our Bigfoot & Pickle Face rubber stamp collection our fish bowl and one of our fun fish images. I rubber stamped both images onto card stock with our child safe/washable ink stamp pad and then I colored in the fish.

I used the exacto knife to cut and "x" in the fish tank and then used sharp scissors to cut out the tank itself. Cut on the inside of the stamped image so you still have the outline of the tank on your card stock.

Cut a piece of Acetate or sheet protector [Acetate is thicker and can be found in the scrapbook section of your local craft store] the same size as your card stock. Turn your "fish tank" onto the back side and glue the clear sheet to it. Then take strips of foam tape and go around your image leaving no spaces, otherwise if you do leave a space your beads will fall through. Depending on the size of your beads, if they are thicker then the foam tape, put another layer of foam tape on top of your existing foam tape [hope this makes sense!]. Your beads will get stuck on the window if your foam tape is not thick enough. Place some beads on top of the clear plastic window~do not use too many as you don't want to cover up your image. Remember, a little bit goes a long way.


Peel of the tape on your foam tape and then stick the "back on" or card stock that has the image you want to show through your window. You have most of your shaker card done!

Have fun decorating and sending out your card! No go and do some stamping and include your children. Kid crafting is so much fun.

Friday, September 4, 2009

Square Pocket Card

This card is very easy and simple to do with the kids. It will make a great thank you card, a cute invitation or a special I love you card. This is also a great idea for a Halloween card.

Excuse my colors, I just wanted to get this posted so my choices were not the most appealing but you should get the idea on how to make this.

Cut out a piece of of 8" x 8" square paper. It does not have to be card stock. You can use pattern paper, or use plain paper or decorate the plain paper to give it some pizazz. Another type of pattern paper you can use is wrapping paper.

Take your 8" square and fold in half on both sides so you have 4 squares. Or score at 4" in both directions. Cut the lower left side square off. Keep the scraps for future projects.

Next, fold "up under" the top left and the lower right to make a triangle flap.

Turn the paper to the back side and glue or use double sided sticky tape to adhere the 2 flaps down.

Here is one flap done, do the next.

Turn it around to the front [or pattern side] and glue or double sided sticky tape along the right side [see my pointer!]. Glue the bottom right triangle up to the top right square. You are going to make a pocket, so only go along the side.

This is what it will look like.

Mount it onto a 4-1/4" x 4-1/4" square card stock. For the small card inside the pocket, cut out 2 squares, one that is 3-1/4" x 3-1/4" in a color card stock and one that is 3" x 3" in white card stock. Glue the white square onto your colored square.

Decorate your card. Here I did 2 cards. The blue one has the small card inside the pocket and orange with green dots shows you the card closed with the note card on the side.

This was a very quick project and did not take much effort. Have fun and include your children in your crafts, it is a great way to spend time together and for them to learn something new.

The stamps are from our Bigfoot & Pickle Face Creations collections, Farm Friends and Circus Act. I used our child safe/washable ink stamp pad in black to stamp the image. Stop by our website to find out more about us and visit our store to purchase any of our products.

We love comments and feel free to pass our blog to your friends or mention us on twitter, you can also join us on Facebook and become a fan. Have a great weekend and happy stamping!

Tuesday, August 25, 2009

Mini Pizza Box

These mini pizza boxes are great for gift cards and to put candy and treats into and it will even fit chocolate chip cookies. Make them for a birthday party or a holiday event. You will find this project very simple to put together, the hard part will be deciding on how to decorate it!

Cut a piece of of card stock 6" x 11". On the 6" side score at 1" and 5". Turn the card stock around and on the 11" side score at 1", 5", 6" and 10". Cut on the 11" side shown in red to create the flaps on your box.


Adhere the flaps to the inside of the box.


Decorate your box and fill it with goodies. You may want to decorate the box before you glue it together, as it may be easier especially if you are using embellishments. Have fun!


Here we used stamps from our Bigfoot & Pickle Face Creations Circus and Farm set. Have an idea on a project, feel free to comment! Thanks for visiting.

Wednesday, June 24, 2009

Stair Step Card

Here is a real easy card to make with your children. It is fun and simple and you don't need much skill, and the end result will make you look like you have been doing these cards professionally for years. My cards are thank you cards as we just recently had a birthday party and need to send out some thank you cards; but these cards can be used for any occasion.

Cut your paper [card stock]. I have a paper trimmer that you can change the blade out to use as a scorer. It cost me $9.99 at the local craft store. You will use the paper cutter/scorer a lot if you intend on following my blog ~ so you will get your money's worth out of purchasing this type of item if don't have one already.

Your main card size is 10-1/2" x 4-1/4"; you should get 2 out of 1 piece of paper [use card stock]. If you want to make the card wider, then adjust the 4 1/4" to your chosen size. So cut your paper to 10-1/2" x 4-1/4" [keep the 4" x 1" strip].

Score in the landscape position at 1-1/4", 2-1/2", 4-1/4", 6" and 8-1/4". Fold your paper like a stair step starting at the 1-1/4" score line ~ see photo.

Next cut the paper for your stair steps. I used scrap paper from prior projects and the left over piece from this project. You will need the following sizes for your steps: 4" x 2", 4" x 1-1/2" and 4" x 1". You can use any type of paper and it does not need to be card stock.

Next step is the fun part, decorating. Glue or use double sided tape on the pieces you cut for the "steps" and place them on your card. I printed out on the computer a note for the first step that said "Thank You for the Gift". This could be any message you want to say. You can also use stamps that have a saying you like. If using stamps then stamp the wording before adhering the piece to the step in case you have an error. If you know how to emboss you can also emboss the words [but as this blog is for kids projects, we don't do embossing as it is too complicated at this point in our life].

Here we used the stamps from our Bigfoot & Pickle Face line ~ SKU#CRC01 which is also located in our starter kit SKU#KITCRC01. Start to decorate, use your imagination. I used paper from a prior painting project and incorporated it into the cards.


Last step is to place your message ~ and this you can do on the back of the card. I put a separate piece of paper on the back to write our note. The majority of the paper I used was from scraps, so whenever you do a project -- keep those scraps. The images were stamped with our child safe/washable ink pad in black and then colored with washable markers, crayons and pencils. Everything we do is washable.

This card will fit in a 3-1/2" x 5" envelop ~ as long as you don't make your back image too high.

As I am behind in providing you with some crafty ideas, I will attempt to get another project up on this blog this week.

To find out more about us, visit our website at http://www.bigfootandpicklefacecreations.com and to shop go to our storefront at http://stores.bigfootandpickleface.com/StoreFront.bok