Showing posts with label circus. Show all posts

Friday, February 26, 2010

Triangle Treat Box - Homemade

Once again, this item is great as a party favor for a birthday, bridal shower, baby shower or for a holiday gathering. Very easy and quick to make and a wonderful project for the kids to assist with decorating. It took me about 5 minutes to put this together.

Take a 8 1/2" x 11" piece of card stock and on the 8 1/2" side score or fold at 3 1/2", 7" and 10 1/2". Turn to the 11" side and score at 3". Cut as shown below up to the score line and cut off the small end piece. Fold and glue the box together on the side.

Fold 2 of the flaps back and up and hold and take a pencil and trace the triangle onto the piece of card stock. Do this with all 3 sides. See below for example.

Cut along the triangle and cut on the inside of the triangle. Glue the flaps down.

Decorate and then put your treats in a bag and you are done. If you would like to have a top border, the paper size is 1" x 11". The font that I used is from the following website ~ freefontfun.com. You will find many cool fonts and it is very easy to download.


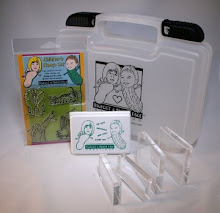
The elephant is from Bigfoot & Pickle Face clear rubber stamp set and I designed a hat for him to dress him up for a party. Go to our storefront if you would like to purchase the stamp set; don't forget to buy a child safe/washable ink stamp pad. Have fun and have a great weekend creating kids crafts!

Thursday, January 28, 2010

Template Half Page and Full Page ~ Circus Tent

Here are the templates for the Circus Tent I promised. If you need a smaller size, see the post I did on January 25, 2010 HERE.

Here is my Circus Tent that I did on the 2 per half sheet. I did not get a chance to finish it, but when I showed the kids my example many of them wanted to copy it. Bigfoot & Pickle Face provides a wonderful selection of circus stamps on our online store, visit there for ideas and to purchase.


Remember, these are my designs so if you are using them and publishing them please give me credit. They are a copyright 2010 of Bigfoot & Pickle Face.


2 per page Circus Tent


Full Page Circus Tent


Happy stamping and have a great week. Make sure you include the kids when crafting, you will be amazed at what they will create.

Monday, January 25, 2010

Small Templates ~ Barn, Fish Bowl and Circus Tent

I was asked by a friend if I could entertain the kids that came into their grocery store during their grand opening by having some type of kids craft project using Bigfoot & Pickle Face rubber stamps.

I designed some templates for them to stamp on to, then they colored them in and put them onto the bookmark with a glue stick. I did not have my camera along to capture them rubber stamping and coloring, so here are my samples.

Some if the kids were reluctant at first to sit down, but once they started stamping and coloring there was no stopping them. Although I was not there to sell, one mom did buy my display sample of the Farm Friends stamping kit and another clear stamp set to compliment the kit. She emailed me and said that her kids rubber stamped all day Sunday and today [no school today].

So below are the templates that I used for the bookmarks. Right click and save them to a folder on your computer, print out, cut and decorate. As for the backing for the bookmark, I just cut a piece of card stock that was a bit larger then the image and put a decorative top border to give it color. I then cut at and angle to give it a "tag" look. I was going to hole punch and put decorative string or ribbon through the hole but did not have enough supplies that coordinated with it. Instead I used a punch that I had laying around and glued it to the top part of the tag. Use your imagination and what you have handy and you will be amazed at what you can create.

Barn Template


Circus Tent Template


Fish Bowl Template

I tried to put as many images on a sheet as to not waste paper. I printed it on white card stock, but regular white printer paper should work. The templates are a copyright 2010 of Bigfoot & Pickle Face, I just did not want to print it on the template and have it print out on your final copy. Feel free to use the templates, just give me the courtesy and credit of mentioning my name if you are going to post it somewhere on the web. The fish bowl is sold as a stamp on Bigfoot & Pickle Face storefront, if you would like to purchase it as a stamp. You will need a 4" x 4" acrylic block for the stamp.

Later this week I will post additional templates with the images enlarged, so you can add additional rubber stamps to the scene.

Thanks for stopping by and following my blog [or if you stumbled upon it ~ yeah!], feel free to pass this on to your family and friends and happy stamping!

P.S. the kids artwork looked quite a bit better then mine, as they don't worry about the little things that us adults do.

Friday, October 16, 2009

More Shaker Card Fun

Here is another shaker card that I did. This time I cut out a square for my window. This is a great idea for holiday cards and you can use the beads as if they were snow.

Use your imagination and you will be amazed at what you will come up with. Let your child work with you and use their imagination and you will have something you will never be able to re-create :)!


Keep stamping and having fun! All of our stamping products are proudly Made in the U.S.A.

Wednesday, October 14, 2009

How to make an I Spy Game

You will find this project is so much fun to do with the kids, as they can help choose what to use for the I Spy game pieces. Of course I needed a way to incorporate our wonderful clear stamps into this project so with the use of Shrinky Dinks we were able to condense the size of the image and make it a fun way to incorporate it into the game.

Here I stamped my clear rubber stamp images with Stazon Black ink onto the Shrinky Dink and then colored the images with permanent markers. Stuck them in the oven and cooked them according to the Shrinky Dinks instructions. I used one image from each of the 3 themes we carry, Fun with Fish, Farm Friends and Circus Act. I did a different quantity of each so that they can count how many they see of each when the kids play the game. I drew some pumpkins to add to the fun.

Next, find all the goodies you want to include in your I Spy Game. Use paper clips, safety pins, coins, beads, buttons, some confetti or whatever else you can find handy~don't forget your Shrinky Dink images.

I cut a circle of different sizes from coordinating card stock ~ so that I could layer it later and give my I Spy Game some durability. If you are unable to do a circle, then a square will work just great! Use an Exacto knife with a ruler to cut out the square.

Then clip all pieces of card stock together to layer it.


Cut your layered pieces into a square and then glue them all together. I used a little bit of glue on each sheet around the circle area. I cut another plain piece of card stock the same size as my finished layer pieces to use for the back. Do not put the back on yet!

Glue a clear sandwich bag onto the back of your layered card stock, glue just around the square part and then fill the bag with your "treasures". Use glue to put the back on to cover the baggie and then I used clear packing tape all around the edges to seal it up [framed it]. You can make a note of how many items you put inside the baggie before you seal it up; I did not as some of the pieces do not show because I left the baggie square. Ask your child "how many yellow paperclips can you find", as it is a great way to re-enforce counting.


Have fun with this project and take it on trips as a way to entertain your child~it does not take up much space. Kids crafts are fun when you include your children and rubber stamping can be incorporated in almost any project :).

Thanks for visiting and fill free to comment on this project. Visit our storefront to purchase your stamps today or stop at our website to find out more about us. Never stop stamping!

Tuesday, September 22, 2009

Stamped Clear Treat Bags

Dress up these bags for a party, family gathering or holiday. You can use recycled bags from clear rubber stamps that you buy; and store your stamps in CD cases for easy access. The bags that I used are polypropylene header bags that seal on the bottom, they usually sell them in large quantities~so you could chip in with some friends if you wanted to keep some on hand. These bags come in all different sizes, depending on the type of "treats" you want to put inside them; you can also check your local craft store to see if they carry them or something similar.

Treats don't necessarily have to be candy, they can be items you pick up at the dollar store for party favors or a healthy snack. A combination of both is nice too.

Take your rubber stamp and stamp your image onto the clear bag using StazOn Jet Black or White. Use a type of ink that dries fast and is designed to stamp on plastic.

Measure the size of your bag and cut out a piece of card stock that is a bit longer. My bag measured 5" x 6" so I cut my card stock at 5" x 7-1/2". I scored at 1-1/2" along the 7-1/2" side. Fold down the clear header on the clear plastic bag and attach the card stock as shown. Staple on either side to hold it shut on the top.

Decorate your bag and fill with goodies. For thebag on the left, I cut a circle 5" round and then folded it in half over the top of the clear header bag.

Have fun with this project and include your kids as they will just love decorating and filling the bags. Great for Halloween treats, Fall Parties, Christmas goodies and birthday parties as it is that time of the year. From our Bigfoot & Pickle Face Creations clear rubber stamp collection I used the circus set stamps. I stamped the saying with our child safe/washable ink stamp pads in the color pink.

Happy stamping and come visit us at our website or storefront to purchase our products that are geared for kids crafts. All products are made in the U.S.A.

Wednesday, September 16, 2009

Homemade Card with Layers

This is a quick and easy card that does not take much time to put together. A great way to show your kids how to layer. Not all cards need a saying, some cards are decorative enough by themselves. This card will be used as a quick note card.


Cut a piece of card stock at 8-1/2" x 4-1/4". Score in half at 4-1/4". Then cut out coordinating paper for layering of 4" x 4" square [which I did in a pattern], 3-1/4" x 3-1/4" square, and 3" x 3" square [the layers do not have to be card stock]. Layer the look how you want it to appear on the card.

Then cut out a piece of white card stock size 2-1/2" x 2-1/2" square. Use your clear rubber stamp and stamp your image onto the card stock. If you make a mistake you can always use the opposite side of the paper. I used the giraffe from out Circus Act set of our Bigfoot & Pickle Face Creations Collection. We used our child safe/washable ink stamp pad in black to stamp the image. This ink is wonderful as it is easy to clean up and is kid safe.

Lastly, apply to your card and decorate. I place it a bit off to the side and cut out some leaves from a paper punch I had and ran them along the side and bottom. There are so many ways to decorate a card, the best is to let your imagination run wild and have your children assist and make their own cards. Inside I put a white piece of card stock size 4" x 4" so I can write my note.

Crafting is so much fun and great relaxation and the best time is when you invite your kids to do crafting with you. Feel free to leave a comment about this project or others or visit us on our website or at our store to purchase your stamping products. All of our products are made in the USA. Thanks for stopping and stamping!

Saturday, September 12, 2009

How to make a Matchbox

So I decided to make a matchbox in order to put the playing cards in that I made for Cards for Kate Card Drive on Jennifer McGuire's ink blog. I had seen some cute decorated matchboxes on some blogs and thought if I increased the size to accommodate the playing cards that it would be cute. I found a great blog that has a template, unfortunately my playing cards are much bigger so I had to design my own template, but visit The Swap-bot Weblog for a great tutorial by Rachel.

If you would like a larger template~send me an email and I can forward the document to you. NOTE: before you start, practice, practice, practice...do not use your good paper until you feel confident about what you are doing. The inside drawer needs to be a bit smaller then the outside wrapper, so make sure you cut and score accordingly as it is very tricky to fit the drawer box inside the outside wrapper. Don't get frustrated, keep trying. This project will be good for older kids, as younger ones will not have the patience to wait. Parents should assist with this project.

Print onto heavy card stock your templates. Cut along solid lines, score [fold] along dotted lines. On the inside drawer, score slightly smaller then the dotted lines so that the box will fit inside the outside wrap. I did the envelope style matchbox shown on Swap-bot Weblog, so it is very important that the inside drawer is smaller otherwise you will have to struggle to slide it in. As you can see that I keep stressing the size of the inside drawer~I had 3 attempts until I got it right!


If you want to put a handle on the inside drawer, do it before you glue everything together. You will want to do it on the shorter end of the drawer and attach it on the bottom flap. Glue down the long sides first. See photo above and then below to see the example. You can use glue or double sided sticky tape~I used a combination of both.


Glue down the tabs to the short side on the inside of the drawer, see below photo. Glue and fold the flap down in to hide the tabs. Do this on both sides. You should have a drawer when you are done.


On the outside wrap, glue the tab down on the inside and then fold and wrap around gluing as you go. The last flap will go inside the box, so do this last. You will end up with something that looks like a crayon box.


Here are the boxes completed. Let the glue dry completely.


Now decorate your box. I put a card on the top of my box, with a personal note inside. On the opposite side, I stamped some images on to another piece of card stock and used double sided sticky tape to adhere it to the outside wrap. I wrapped ribbon with double sided sticky tape around the box to give the 3 sides some color. I did use Mod Podge on the inside of the outside wrap to allow for the drawer to move smoothly. [Visit Amy~Mod Podge Rocks blog for other Mod Podge ideas].


Matchboxes make wonderful boxes to store small thing in and is a great idea for a birthday party craft idea. Make up the boxes in advance and then have the kids decorate. Be creative.

In this example I used from our Bigfoot & Pickle Face Creations Collection the "lion" from our Circus Act Set, to keep with the theme of the playing cards. I stamped with our child safe/washable ink stamp pad in black.

Stamping is so much fun and there are many projects to use clear rubber stamps with, the best is when you work with your children. Since this set was homemade and one of a kind, my daughter would like her own cards now! Sometimes the best projects take the most time, but the results are rewarding. Thanks for visiting and "Come play and join the Fun!".

Thursday, September 10, 2009

Homemade Playing Cards

Thought I would put together some playing cards to send for the Cards for Kate Card Drive that is posted on Jennifer McGuire ink blog. This took some time, but the results were well worth it. This is a great project to do with your children, since they will love all the gluing and coloring and it gives them the ability to make their own set of cards.

Depending on how many cards you want to make will determine how many pieces you will cut out. I did 18 playing cards for our memory game~so you will need to do 2 of each image [9 images from our clear rubber stamps circus sets].

Cut out [18] pieces of pattern paper size 3" x 4", [18] pieces of white card stock or thin cardboard size 2-1/2" x 3-1/2". Glue or use double sided sticky tape and put the print and white card stock together (as shown in the photo below). You will put the white card stock on the backside of the printed paper. If you have double sided printed paper then choose what side you want on front and you will then be covering the other side. [Excuse my fuzzy edges on my paper~I need a new blade for my cutter and they were out of them at the store :)]

Cut out the corners on all 4 sides as shown. Then use glue or double sided sticky tape and glue the short side down (as shown in the middle sample), and then do the same to the long side. Finished card should look like the sample on the right.

Cut out [18] coordinating colors in card stock size 2-1/4" x 3-1/4". You can use white and not have another piece of card stock and then complete your project, but in this example I used a colored card stock to go with my printed paper. I wanted to make a heavier playing card, as little hands will be playing with them. Glue or double sided sticky tape the color card stock onto the backside [white] of your printed piece. See photo for example. You do not have to do one color, you can do several colors as I did below.

Cut out [18] pieces of white card stock in size 2" x 3". Stamp your image 2 times on to the white card stock paper and color them in.

Glue or double sided sticky tape your finished card to the colored card stock. Your end result will have one side with the image and the other side with your print. Now you can play memory or go fish. I took it one step further as I wanted to give the cards a "matte" finish.

Put 2 coats of Mod Podge onto the cards, but I have to warn you that if you use child safe/washable ink, it may bleed a little. You may want to use a permanent ink stamp pad and if working with children the adult do the stamping. I did use permanent markers to color in my images, and then I did not have to worry about bleeding when I used the Mod Podge. You do not have to do this step, but I wanted to have the extra glue to keep it together and matte finish. If you are going to use the Mod Podge, then do this at night when the kids are in bed. The Mod Podge does dry clear.

The cute stamps in this project came from our Bigfoot & Pickle Face Creations Collection~Circus Act! I did use permanent colored markers to color in the images and stamped the images with our child safe/washable ink stamp pad in black. I used double sided sticky tape, washable glue and glue stick to put all the pieces together. It took some time and work but it was lots of fun.

So start stamping today and make a set of playing cards with your kids or make and give as a gift. As always, you are welcome to visit our website for more information about us and to purchase these great products that are made in the USA, visit our storefront! Never stop having fun and thank you for visiting us. Leave us a comment or follow us, we love it.

Visit us tomorrow, as I will make something to hold the cards. Better yet, subscribe to our feed or subscribe via email so you will be notified when I add things to my blog.

Tuesday, August 25, 2009

Mini Pizza Box

These mini pizza boxes are great for gift cards and to put candy and treats into and it will even fit chocolate chip cookies. Make them for a birthday party or a holiday event. You will find this project very simple to put together, the hard part will be deciding on how to decorate it!

Cut a piece of of card stock 6" x 11". On the 6" side score at 1" and 5". Turn the card stock around and on the 11" side score at 1", 5", 6" and 10". Cut on the 11" side shown in red to create the flaps on your box.


Adhere the flaps to the inside of the box.


Decorate your box and fill it with goodies. You may want to decorate the box before you glue it together, as it may be easier especially if you are using embellishments. Have fun!


Here we used stamps from our Bigfoot & Pickle Face Creations Circus and Farm set. Have an idea on a project, feel free to comment! Thanks for visiting.

Wednesday, August 5, 2009

Treat Bag decorated with clear rubber stamps

This cute little treat bag is very simple to make and is great for any season or theme. Fill it with candy for Halloween, knick knacks for a birthday party or a gift card for that special event. It is 2" wide so lots of room for all sorts of goodies. This project is fun for the whole family and a very simple project to do with your children. Kids crafts are fun and educational for your children, especially when your are doing it with them.

The completed bag size is 3-1/2" x 2-3/4" x 2". Print the template below onto card stock. Right click and save it to your computer and open to print. It should fit on a 8-1/2" x 11" paper. You want to use card stock as it will give the bag some durability. If you have problems printing the template, email me and I and send it to you as a pdf file.
Cut out the template on the solid lines and score on the dotted lines. Once I cut out the image I used the decorative scissors on the top of the bag to give it a fancy look.

You will decorate the bag before you glue it together, as it is easier to do so when it is flat. I cut out 2 pieces of card stock sizes 2-1/2" x 3" to put on the front and back of the bag. You can also use a decorative paper to jazz up your bag. I stamped clear stamp image onto white card stock and colored it in. It is wise to use washable markers, crayons or pencils when working with children. Here I used from our Bigfoot & Pickle Face Creations Fun with Fish set SKU#FSH05 and our child safe/washable ink stamp pad in black.

Cut out your images and decorate your bag. This is the time to use your imagination. Put a nice saying on your bag to complete the look. I used foam tape to make my images stand out. You will want to do this so that when you thread the ribbon through the front of the bag it goes under your image and saying. Use double sided sticky tape or a glue stick to glue your bag together. Make sure that you fold in the side flap and then at the bottom the square flaps go on the inside. Cut a 15" piece of ribbon and tie it around your bag and knot at the top once you put your treat inside.

If you have any questions or suggestions, don't hesitate to comment or email me. Visit our storefront to purchase any of the Bigfoot & Pickle Face Creations clear rubber stamps line or our website to find out more about us. The fish set used above is included in our Clear rubber stamp Starter Kit~Fun with Fish SKU#FSH05. Strong man is from our circus set SKU#CRC02.

Clear rubber stamping is fun, especially when you include your children. Many of your projects may look like a child did it, that makes it much more special to receive it as a gift. Happy Stamping!