Tuesday, September 22, 2009

Stamped Clear Treat Bags

Dress up these bags for a party, family gathering or holiday. You can use recycled bags from clear rubber stamps that you buy; and store your stamps in CD cases for easy access. The bags that I used are polypropylene header bags that seal on the bottom, they usually sell them in large quantities~so you could chip in with some friends if you wanted to keep some on hand. These bags come in all different sizes, depending on the type of "treats" you want to put inside them; you can also check your local craft store to see if they carry them or something similar.

Treats don't necessarily have to be candy, they can be items you pick up at the dollar store for party favors or a healthy snack. A combination of both is nice too.

Take your rubber stamp and stamp your image onto the clear bag using StazOn Jet Black or White. Use a type of ink that dries fast and is designed to stamp on plastic.

Measure the size of your bag and cut out a piece of card stock that is a bit longer. My bag measured 5" x 6" so I cut my card stock at 5" x 7-1/2". I scored at 1-1/2" along the 7-1/2" side. Fold down the clear header on the clear plastic bag and attach the card stock as shown. Staple on either side to hold it shut on the top.

Decorate your bag and fill with goodies. For thebag on the left, I cut a circle 5" round and then folded it in half over the top of the clear header bag.

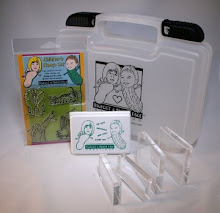
Have fun with this project and include your kids as they will just love decorating and filling the bags. Great for Halloween treats, Fall Parties, Christmas goodies and birthday parties as it is that time of the year. From our Bigfoot & Pickle Face Creations clear rubber stamp collection I used the circus set stamps. I stamped the saying with our child safe/washable ink stamp pads in the color pink.

Happy stamping and come visit us at our website or storefront to purchase our products that are geared for kids crafts. All products are made in the U.S.A.

Monday, September 21, 2009

Lollipop~Sucker Holder

Every time we go to the bank my kids get lollipops, so I loved this wonderful idea I saw on The Frugal Crafter for lollipops [flat ones]. Time to give away all those lollipops that the kids have not eaten and have it in a cool pouch. This is a great idea for party favors or trick or treat [if you have a small neighborhood]. Easy peasy to make and the kids will love making and receiving them.


I did not have the machine that The Frugal Crafter had, so I designed my own template. This template is designed as a square card originally that you decorate on the square and then fold in the sides, but with a bit of a modification you will have a lollipop treat holder. I did 2 styles, a 2" and a 3". So the inside square measures either 2" or 3". The 2" template I was able to fit 4 on a page. 3" template will only fit one.

2" Template

3" Template
Print out the template and cut around the outside solid line.


Score 3 sides only and fold up and glue. It was easier for me to have the bottom fold on the outside, but you can have the bottom tucked in too.


Decorate with your favorite embellishments. I cut out a 2" x 2" square of a coordinating color and glued it on the front of the 2" size. Cut a 3" x 3" square for the front of the 3" size. I used the fish from our Bigfoot & Pickle Face Creations clear rubber stamp collection and stamped the image with our child safe/washable ink stamp pad. I colored and then cut the image out and adhere it to the card with some foam tape to give it a raised look. I decorated around the pouch with some colored pencils.

Use your imagination when it comes to decorating and definitely include your kids, as they will think this is a great way to dress up a lollipop. Never stop having fun, so continue to stamp your life away! Thanks for visiting us and stop at our store if you would like to purchase our products, they are made in the U.S.A.

Thursday, September 17, 2009

Pull Treats or Candy Bar Holder

This is a great idea for parties or use as a reward for a great job done. These are also wonderful for teacher appreciation. Have your kids assist as they will have fun decorating, but beware as they may want to eat the treat. Think about making some for a Halloween party~what a great party favor. All the recipient of this wonder pull treat needs to do is pull up on the ribbon and the candy bar will rise!


Cut out a piece of 6" x 7" card stock, this will be the holder for the candy cover. If you want to wrap a "band" around the pouch then cut out another piece of paper or card stock in 2-1/2" x 6-1/2".


On the 6" x 7" card stock, score along the 6" side at 2-3/4" and at 5-1/2". If you are going to use a band around the pouch then score at 2-3/4" and at 5-1/2".


Apply double sided sticky tape to the base and then along the side with the flap and seal it closed. Wrap the band around the pouch and use sticky tape to close. All flaps should be tucked inside and not be seen.

Decorate your holder with additional embellishments, ribbons, rubber stamps and sayings. Punch a hole in the top part of your pouch. Cut a piece of ribbon anywhere from 18" to 30" [depending if you want to make a bow or just a knot ~ bows take more ribbon.

Thread the ribbon through both holes and line up the ribbon to be even size in length on both sides.


Push the candy bar down on top of the ribbon's center and you will see the ribbon shrink on the sides.


Push the candy bar all the way down into the pouch and tie the ribbon with a knot or bow. Pull up on the ribbon [no need to untie the ribbon] and the candy bar will rise.


This project did not take much time so have fun decorating. Whomever you make one of these for will be awed by the fabulous card and the yummy treat.

I used clear rubber stamps from our Bigfoot & Pickle Face Creations Collection, Farm Friends and Circus Act. Child safe/washable ink stamp pad in black was used to stamp the image. Let your imagination run wild and go crazy over this idea. Thanks for stopping by and never stop stamping.

Wednesday, September 16, 2009

Homemade Card with Layers

This is a quick and easy card that does not take much time to put together. A great way to show your kids how to layer. Not all cards need a saying, some cards are decorative enough by themselves. This card will be used as a quick note card.


Cut a piece of card stock at 8-1/2" x 4-1/4". Score in half at 4-1/4". Then cut out coordinating paper for layering of 4" x 4" square [which I did in a pattern], 3-1/4" x 3-1/4" square, and 3" x 3" square [the layers do not have to be card stock]. Layer the look how you want it to appear on the card.

Then cut out a piece of white card stock size 2-1/2" x 2-1/2" square. Use your clear rubber stamp and stamp your image onto the card stock. If you make a mistake you can always use the opposite side of the paper. I used the giraffe from out Circus Act set of our Bigfoot & Pickle Face Creations Collection. We used our child safe/washable ink stamp pad in black to stamp the image. This ink is wonderful as it is easy to clean up and is kid safe.

Lastly, apply to your card and decorate. I place it a bit off to the side and cut out some leaves from a paper punch I had and ran them along the side and bottom. There are so many ways to decorate a card, the best is to let your imagination run wild and have your children assist and make their own cards. Inside I put a white piece of card stock size 4" x 4" so I can write my note.

Crafting is so much fun and great relaxation and the best time is when you invite your kids to do crafting with you. Feel free to leave a comment about this project or others or visit us on our website or at our store to purchase your stamping products. All of our products are made in the USA. Thanks for stopping and stamping!

Saturday, September 12, 2009

The Mom Blog

I am now listed on The Mom Blog. Feel free to click on my link and send a review from The Mom Blog of what you think! [Send a review is located on the right side by my link] Thanks and have a great weekend.

Cheryl

How to make a Matchbox

So I decided to make a matchbox in order to put the playing cards in that I made for Cards for Kate Card Drive on Jennifer McGuire's ink blog. I had seen some cute decorated matchboxes on some blogs and thought if I increased the size to accommodate the playing cards that it would be cute. I found a great blog that has a template, unfortunately my playing cards are much bigger so I had to design my own template, but visit The Swap-bot Weblog for a great tutorial by Rachel.

If you would like a larger template~send me an email and I can forward the document to you. NOTE: before you start, practice, practice, practice...do not use your good paper until you feel confident about what you are doing. The inside drawer needs to be a bit smaller then the outside wrapper, so make sure you cut and score accordingly as it is very tricky to fit the drawer box inside the outside wrapper. Don't get frustrated, keep trying. This project will be good for older kids, as younger ones will not have the patience to wait. Parents should assist with this project.

Print onto heavy card stock your templates. Cut along solid lines, score [fold] along dotted lines. On the inside drawer, score slightly smaller then the dotted lines so that the box will fit inside the outside wrap. I did the envelope style matchbox shown on Swap-bot Weblog, so it is very important that the inside drawer is smaller otherwise you will have to struggle to slide it in. As you can see that I keep stressing the size of the inside drawer~I had 3 attempts until I got it right!


If you want to put a handle on the inside drawer, do it before you glue everything together. You will want to do it on the shorter end of the drawer and attach it on the bottom flap. Glue down the long sides first. See photo above and then below to see the example. You can use glue or double sided sticky tape~I used a combination of both.


Glue down the tabs to the short side on the inside of the drawer, see below photo. Glue and fold the flap down in to hide the tabs. Do this on both sides. You should have a drawer when you are done.


On the outside wrap, glue the tab down on the inside and then fold and wrap around gluing as you go. The last flap will go inside the box, so do this last. You will end up with something that looks like a crayon box.


Here are the boxes completed. Let the glue dry completely.


Now decorate your box. I put a card on the top of my box, with a personal note inside. On the opposite side, I stamped some images on to another piece of card stock and used double sided sticky tape to adhere it to the outside wrap. I wrapped ribbon with double sided sticky tape around the box to give the 3 sides some color. I did use Mod Podge on the inside of the outside wrap to allow for the drawer to move smoothly. [Visit Amy~Mod Podge Rocks blog for other Mod Podge ideas].


Matchboxes make wonderful boxes to store small thing in and is a great idea for a birthday party craft idea. Make up the boxes in advance and then have the kids decorate. Be creative.

In this example I used from our Bigfoot & Pickle Face Creations Collection the "lion" from our Circus Act Set, to keep with the theme of the playing cards. I stamped with our child safe/washable ink stamp pad in black.

Stamping is so much fun and there are many projects to use clear rubber stamps with, the best is when you work with your children. Since this set was homemade and one of a kind, my daughter would like her own cards now! Sometimes the best projects take the most time, but the results are rewarding. Thanks for visiting and "Come play and join the Fun!".

Thursday, September 10, 2009

Homemade Playing Cards

Thought I would put together some playing cards to send for the Cards for Kate Card Drive that is posted on Jennifer McGuire ink blog. This took some time, but the results were well worth it. This is a great project to do with your children, since they will love all the gluing and coloring and it gives them the ability to make their own set of cards.

Depending on how many cards you want to make will determine how many pieces you will cut out. I did 18 playing cards for our memory game~so you will need to do 2 of each image [9 images from our clear rubber stamps circus sets].

Cut out [18] pieces of pattern paper size 3" x 4", [18] pieces of white card stock or thin cardboard size 2-1/2" x 3-1/2". Glue or use double sided sticky tape and put the print and white card stock together (as shown in the photo below). You will put the white card stock on the backside of the printed paper. If you have double sided printed paper then choose what side you want on front and you will then be covering the other side. [Excuse my fuzzy edges on my paper~I need a new blade for my cutter and they were out of them at the store :)]

Cut out the corners on all 4 sides as shown. Then use glue or double sided sticky tape and glue the short side down (as shown in the middle sample), and then do the same to the long side. Finished card should look like the sample on the right.

Cut out [18] coordinating colors in card stock size 2-1/4" x 3-1/4". You can use white and not have another piece of card stock and then complete your project, but in this example I used a colored card stock to go with my printed paper. I wanted to make a heavier playing card, as little hands will be playing with them. Glue or double sided sticky tape the color card stock onto the backside [white] of your printed piece. See photo for example. You do not have to do one color, you can do several colors as I did below.

Cut out [18] pieces of white card stock in size 2" x 3". Stamp your image 2 times on to the white card stock paper and color them in.

Glue or double sided sticky tape your finished card to the colored card stock. Your end result will have one side with the image and the other side with your print. Now you can play memory or go fish. I took it one step further as I wanted to give the cards a "matte" finish.

Put 2 coats of Mod Podge onto the cards, but I have to warn you that if you use child safe/washable ink, it may bleed a little. You may want to use a permanent ink stamp pad and if working with children the adult do the stamping. I did use permanent markers to color in my images, and then I did not have to worry about bleeding when I used the Mod Podge. You do not have to do this step, but I wanted to have the extra glue to keep it together and matte finish. If you are going to use the Mod Podge, then do this at night when the kids are in bed. The Mod Podge does dry clear.

The cute stamps in this project came from our Bigfoot & Pickle Face Creations Collection~Circus Act! I did use permanent colored markers to color in the images and stamped the images with our child safe/washable ink stamp pad in black. I used double sided sticky tape, washable glue and glue stick to put all the pieces together. It took some time and work but it was lots of fun.

So start stamping today and make a set of playing cards with your kids or make and give as a gift. As always, you are welcome to visit our website for more information about us and to purchase these great products that are made in the USA, visit our storefront! Never stop having fun and thank you for visiting us. Leave us a comment or follow us, we love it.

Visit us tomorrow, as I will make something to hold the cards. Better yet, subscribe to our feed or subscribe via email so you will be notified when I add things to my blog.

Wednesday, September 9, 2009

How to make a Spiral Card

I stumbled upon Jennifer McGuire's blog and she is doing a card drive ~ Cards for Kate Card Drive [Click HERE for her blog to find out more]. I thought it would be a good idea to do a duplicate project of what I post on my blog for the next couple weeks and send one for the Cards to Kate Card Drive. Jennifer McGuire's ink blog provides all the information so please visit her site to participate.

I am blessed to have healthy children and I am more then happy to help those in need~and in this case it does not take much to make someone smile.

This card is very similar to a prior homemade card, I just added the spiral on the inside. You can use any shape card with the spiral; here you will understand the concept.

First cut out of card stock one 4" x 9-1/2". You should be able to get 2 cards out of one 8-1/2" x 11" paper. Score the card at 5-1/2". You can fold and use the card many ways depending on the design you want to end up with. If you want fold the card in half, then score at 4-3/4".

Cut one 4" x 4" and a coordinating strip of 2" x 4". You can cut these strips to the size and look you want to achieve. On the left is the pieces I used and on the right is the card put together using double sided sticky tape. Cut out a circle [mine was 1-1/2" round], and then cut around the outside towards the inside of the circle to create a spiral. See card on the right.

Use double sided sticky tape to adhere the spiral to the inside of the card and put a piece of double sided sticky tape to the top of the spiral so when you close your card it sticks to the top part of the card. See below image.

Decide what you want to put on the spiral and finish decorating your card. You can use glue dots to put the embellishments on the spiral or double sided sticky tape. I created the stars on the computer, printed, cut and colored them. Create a saying for your card. Depending on where you stuck your spiral, there may not be much room to write so just put a piece of white card stock on the back of the card and there you can put your personalized note. You should have room to sign the inside of the card.


I used from our Bigfoot & Pickle Face Creations clear rubber stamps collection the elephant from Circus Set 6 and stamped the image with our childsafe/washable ink pad in black. Visit our website to find out more about us and our storefront to purchase our product. Become a fan on Facebook by clicking HERE.

Have fun stamping and the most important thing is to always include your child, they have the best imagination. If you have a spiral card you made, feel free to post a link to your blog or email me the photo and I will post it for you.

Friday, September 4, 2009

Square Pocket Card

This card is very easy and simple to do with the kids. It will make a great thank you card, a cute invitation or a special I love you card. This is also a great idea for a Halloween card.

Excuse my colors, I just wanted to get this posted so my choices were not the most appealing but you should get the idea on how to make this.

Cut out a piece of of 8" x 8" square paper. It does not have to be card stock. You can use pattern paper, or use plain paper or decorate the plain paper to give it some pizazz. Another type of pattern paper you can use is wrapping paper.

Take your 8" square and fold in half on both sides so you have 4 squares. Or score at 4" in both directions. Cut the lower left side square off. Keep the scraps for future projects.

Next, fold "up under" the top left and the lower right to make a triangle flap.

Turn the paper to the back side and glue or use double sided sticky tape to adhere the 2 flaps down.

Here is one flap done, do the next.

Turn it around to the front [or pattern side] and glue or double sided sticky tape along the right side [see my pointer!]. Glue the bottom right triangle up to the top right square. You are going to make a pocket, so only go along the side.

This is what it will look like.

Mount it onto a 4-1/4" x 4-1/4" square card stock. For the small card inside the pocket, cut out 2 squares, one that is 3-1/4" x 3-1/4" in a color card stock and one that is 3" x 3" in white card stock. Glue the white square onto your colored square.

Decorate your card. Here I did 2 cards. The blue one has the small card inside the pocket and orange with green dots shows you the card closed with the note card on the side.

This was a very quick project and did not take much effort. Have fun and include your children in your crafts, it is a great way to spend time together and for them to learn something new.

The stamps are from our Bigfoot & Pickle Face Creations collections, Farm Friends and Circus Act. I used our child safe/washable ink stamp pad in black to stamp the image. Stop by our website to find out more about us and visit our store to purchase any of our products.

We love comments and feel free to pass our blog to your friends or mention us on twitter, you can also join us on Facebook and become a fan. Have a great weekend and happy stamping!

Wednesday, September 2, 2009

Rubber Stamping and Watercolor Pencils

Kids love to paint, so this project will show how to use watercolor pencils with your rubber stamping projects.

You can purchase at any craft store, watercolor pencils. They look just like colored pencils, but are water-soluble so once water is added to the colored area it acts like watercolor paint. In this project I used Prismacolor Watercolor pencils. You can use a paint brush to blend the colors, here I used a water brush.

Before you do your final project and if you have never worked with watercolor pencils, do some testing first. Practice mixing colors to get a different look, and try it on different types of paper to see what works best. I used white card stock in my project.

In this example I used this "funky" looking frog from our Bigfoot & Pickle Face Creations, Fun with Fish collection. He is quite odd looking but still cute.

I stamped the image with our child safe/washable ink stamp pad in black. Then I took the watercolor pencils and outlined in the areas where I wanted each color to show up. With colored pencils you would just color the whole area, but with watercolor pencils you can just give the area a bit of the color you want and then use water to blend it together to give it a water color look.

On the far left bottom picture I started to blend the colors together with my water brush [or paint brush]. The last picture is the finished product. I added two different colors of blue to give it a water look. Add additional coloring where needed to complete your project. I colored in the eyes with a marker to have that stand out.

Have fun when rubber stamping and use different types of techniques to give it a fun look. I would love to hear from you, I welcome comments. Come see my website or visit my store to purchase this cool stamp. Happy Stamping!

If you don't want to purchase water color pencils, Kate Pullen, at about.com has an article on "Blending Pencil Colors with Mineral Spirits". Water color pencils will work best when working with young kids.