Friday, October 16, 2009

More Shaker Card Fun

Here is another shaker card that I did. This time I cut out a square for my window. This is a great idea for holiday cards and you can use the beads as if they were snow.

Use your imagination and you will be amazed at what you will come up with. Let your child work with you and use their imagination and you will have something you will never be able to re-create :)!


Keep stamping and having fun! All of our stamping products are proudly Made in the U.S.A.

How to make a Shaker Card

All crafts are so much fun to do because it takes you out of your routine and gives you the ability to create. Shaker cards are fun to make and fun to give. This is a very easy and quick project to put together with your child.


First choose and image you want to show through your window. I used from our Bigfoot & Pickle Face rubber stamp collection our fish bowl and one of our fun fish images. I rubber stamped both images onto card stock with our child safe/washable ink stamp pad and then I colored in the fish.

I used the exacto knife to cut and "x" in the fish tank and then used sharp scissors to cut out the tank itself. Cut on the inside of the stamped image so you still have the outline of the tank on your card stock.

Cut a piece of Acetate or sheet protector [Acetate is thicker and can be found in the scrapbook section of your local craft store] the same size as your card stock. Turn your "fish tank" onto the back side and glue the clear sheet to it. Then take strips of foam tape and go around your image leaving no spaces, otherwise if you do leave a space your beads will fall through. Depending on the size of your beads, if they are thicker then the foam tape, put another layer of foam tape on top of your existing foam tape [hope this makes sense!]. Your beads will get stuck on the window if your foam tape is not thick enough. Place some beads on top of the clear plastic window~do not use too many as you don't want to cover up your image. Remember, a little bit goes a long way.


Peel of the tape on your foam tape and then stick the "back on" or card stock that has the image you want to show through your window. You have most of your shaker card done!

Have fun decorating and sending out your card! No go and do some stamping and include your children. Kid crafting is so much fun.

Thursday, October 15, 2009

Cake Slice Project for the Fall

Here is a photo of the cake I recently put together for the Rubber Stamp and Scrapbook Expo I will have a booth at for the weekend of October 24th and 25th, 2009 at the Waukesha Expo Center. I will give this item away for a drawing that I will be having at the show. You can find out how to do this project by going to this link from a previous post.

I used the clear rubber stamps from the Farm Friends collection we carry here at Bigfoot & Pickle Face Creations. Whenever possible I try to use washable products as most of the projects we have are targeted for kids. I stamped the rubber stamp images with our childsafe/washable ink pad.


Come to the show if you are in the area and put your name in the drawing, I would love to see you there! All of our products are Made in the U.S.A.

Wednesday, October 14, 2009

How to make an I Spy Game

You will find this project is so much fun to do with the kids, as they can help choose what to use for the I Spy game pieces. Of course I needed a way to incorporate our wonderful clear stamps into this project so with the use of Shrinky Dinks we were able to condense the size of the image and make it a fun way to incorporate it into the game.

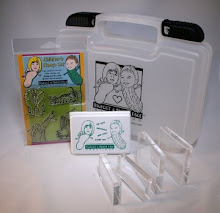
Here I stamped my clear rubber stamp images with Stazon Black ink onto the Shrinky Dink and then colored the images with permanent markers. Stuck them in the oven and cooked them according to the Shrinky Dinks instructions. I used one image from each of the 3 themes we carry, Fun with Fish, Farm Friends and Circus Act. I did a different quantity of each so that they can count how many they see of each when the kids play the game. I drew some pumpkins to add to the fun.

Next, find all the goodies you want to include in your I Spy Game. Use paper clips, safety pins, coins, beads, buttons, some confetti or whatever else you can find handy~don't forget your Shrinky Dink images.

I cut a circle of different sizes from coordinating card stock ~ so that I could layer it later and give my I Spy Game some durability. If you are unable to do a circle, then a square will work just great! Use an Exacto knife with a ruler to cut out the square.

Then clip all pieces of card stock together to layer it.


Cut your layered pieces into a square and then glue them all together. I used a little bit of glue on each sheet around the circle area. I cut another plain piece of card stock the same size as my finished layer pieces to use for the back. Do not put the back on yet!

Glue a clear sandwich bag onto the back of your layered card stock, glue just around the square part and then fill the bag with your "treasures". Use glue to put the back on to cover the baggie and then I used clear packing tape all around the edges to seal it up [framed it]. You can make a note of how many items you put inside the baggie before you seal it up; I did not as some of the pieces do not show because I left the baggie square. Ask your child "how many yellow paperclips can you find", as it is a great way to re-enforce counting.


Have fun with this project and take it on trips as a way to entertain your child~it does not take up much space. Kids crafts are fun when you include your children and rubber stamping can be incorporated in almost any project :).

Thanks for visiting and fill free to comment on this project. Visit our storefront to purchase your stamps today or stop at our website to find out more about us. Never stop stamping!

Friday, October 2, 2009

Rubber Stamping on Shipping Tags

I have a box of shipping tags laying around and so I decided they would make a nice tag for a treat bag. I know I have been focusing on different type of "treat bags", but I wanted to give different options for Halloween as it is just around the corner. If you are having a party or a play date, they make a nice little bag for snacks. Put in a party mix, trail mix or some of your favorite candy and let the kids enjoy. Include them and have them make their own tag for an afternoon craft project and then put the tag on their treat bag for a nice surprise.


This is a very easy project. I took a shipping tag like the one shown below and I glued it onto some printed paper and cut around the tag; do the same process to the back side of the tag. My tag is not white, it was more of a cream color so I covered it with the patterned paper as I don't like the color by itself much. I stamped the pig image from our Bigfoot & Pickle Face Creations rubber stamp Farm Collection on the tag. I added a spider and pumpkin to make it look like Halloween. I removed the string and threaded an orange ribbon through the hang hole and used a brad to hold the ribbon together.


I purchased these "Bagettes" at the craft store, where they had a different variety of sizes to choose from. I filled up the bag with goodies, sealed it and added my newly decorated tag.

Here is the finished tag without the treat bag. I used a blender sponge to add the blue and the green ink around my stamped image. I layered the head of the pig on my stamped image to give it some height and added wiggly eyes for fun.

There are endless ideas for decorating these tags, just use your imagination and include your kids when you are doing craft projects as that will add to the fun. Happy stamping and never stop having fun! Thanks for visiting our blog.

Thursday, October 1, 2009

Decorated Sandwich Bag for Treats

I know the previous post talked about decorating header bags that come with your clear stamps, but I realize you may not find those types of bags so here is another option.

You can use generic sandwich or snack bags and fill them with treats. Halloween is just around the corner and if you need something for a party or you want to give out individual bags, you can add a bit of a decoration to a sandwich bag and be the "cool" house on the block. These are great projects to work on with the kids and they will get a joy out of filling the bags.


First measure the size of your sandwich bag on the bottom. Mine was 6-1/2". I wanted to have a flap of 2" so I cut a piece of card stock 6-1/2" x 4" and then scored at 2" on the 4" side.


Staple your card stock to the bottom part of the sandwich bag. You can staple along the middle or down toward the edge of your card stock because you will be covering the staples not matter where you put them. You are stapling at the bottom so you can put your goodies in when you are finished.


Cut our your pieces you want to use to decorate your treat bag. Here I cut out pieces for layering.

Then decorate your bag. Use your clear rubber stamps to add additional images. I did some layering to bring out some additional colors.

Here is the same concept used with a patterned Halloween Ziploc bag. I put the card stock at the top and attached it to the front side above the closer. You can open the bag in the back to fill with treats.


I used clear rubber stamps from our Bigfoot & Pickle Face Creations Farm Collection to add additional decorations to the bag. These clear rubber stamps are great because they can be used for any theme. I used the child safe/washable ink stamp pad in black to stamp the images and then I colored with a combination of colored pencils and markers.

Have fun and continue to visit our blog for updated ideas. Stamping is fun on your own but a blast when you include your children. Thanks for visiting and sign up for email notifications so you can get the up to date information.