If you would like a larger template~send me an email and I can forward the document to you. NOTE: before you start, practice, practice, practice...do not use your good paper until you feel confident about what you are doing. The inside drawer needs to be a bit smaller then the outside wrapper, so make sure you cut and score accordingly as it is very tricky to fit the drawer box inside the outside wrapper. Don't get frustrated, keep trying. This project will be good for older kids, as younger ones will not have the patience to wait. Parents should assist with this project.
 Print onto heavy card stock your templates. Cut along solid lines, score [fold] along dotted lines. On the inside drawer, score slightly smaller then the dotted lines so that the box will fit inside the outside wrap. I did the envelope style matchbox shown on Swap-bot Weblog, so it is very important that the inside drawer is smaller otherwise you will have to struggle to slide it in. As you can see that I keep stressing the size of the inside drawer~I had 3 attempts until I got it right!
 If you want to put a handle on the inside drawer, do it before you glue everything together. You will want to do it on the shorter end of the drawer and attach it on the bottom flap. Glue down the long sides first. See photo above and then below to see the example. You can use glue or double sided sticky tape~I used a combination of both.
 Glue down the tabs to the short side on the inside of the drawer, see below photo. Glue and fold the flap down in to hide the tabs. Do this on both sides. You should have a drawer when you are done.
 On the outside wrap, glue the tab down on the inside and then fold and wrap around gluing as you go. The last flap will go inside the box, so do this last. You will end up with something that looks like a crayon box.
 Here are the boxes completed. Let the glue dry completely.
 Now decorate your box. I put a card on the top of my box, with a personal note inside. On the opposite side, I stamped some images on to another piece of card stock and used double sided sticky tape to adhere it to the outside wrap. I wrapped ribbon with double sided sticky tape around the box to give the 3 sides some color. I did use Mod Podge on the inside of the outside wrap to allow for the drawer to move smoothly. [Visit Amy~Mod Podge Rocks blog for other Mod Podge ideas].
 Matchboxes make wonderful boxes to store small thing in and is a great idea for a birthday party craft idea. Make up the boxes in advance and then have the kids decorate. Be creative.
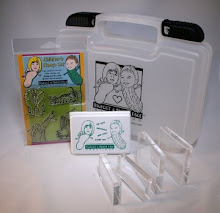
In this example I used from our Bigfoot & Pickle Face Creations Collection the "lion" from our Circus Act Set, to keep with the theme of the playing cards. I stamped with our child safe/washable ink stamp pad in black.
Stamping is so much fun and there are many projects to use clear rubber stamps with, the best is when you work with your children. Since this set was homemade and one of a kind, my daughter would like her own cards now! Sometimes the best projects take the most time, but the results are rewarding. Thanks for visiting and "Come play and join the Fun!".


Cute! I have decorated matchbox for crafts but never made my own. Great idea! Visiting from MBC. Following now :)
ReplyDeleteFirst time reading this blog, thanks for sharing.
ReplyDelete