Friday, August 28, 2009

Shrinky Dinks and Clear Rubber Stamps

As kids we enjoyed not only using rubber stamps on rainy days, but we also loved doing Shrinky Dinks. Shrinky Dinks was first sold in stores in 1973, so parents that grew up with Shrinky Dinks love doing them now with their children. You can draw free hand on the plastic or you can use rubber stamps and color in the shapes, do a combination of both.

In the following pictures you can see how much fun we had with Shrinky Dinks using our Bigfoot & Pickle Face Creations clear rubber stamps. Below the girls are coloring in their designs on the plastic sheet.

When using rubber stamps with Shrinky Dinks, you must use alcohol-based permanent ink stamp pad and Shrinky Dinks recommends Stazon Inks because they have been tested. We colored in with permanent colored markers to get the look we wanted. Note: since many of the projects I do are for young kids, when doing this project the adult should stamp the image on to the paper and then advise the child the importance of not coloring on themselves or any other surface with the permanent markers. I informed the girls that they were using "big" girl markers and needed to only color on the plastic. They thought it was cool they could use markers they don't normally have access to. Here was our results. The girls wanted to go off and play so into the oven the pieces went.

Put them in the oven for 3 minutes and look at the results.

Now they stopped playing to make some bracelets with the Shrinky Dinks.


Warning: don't forget about the 21 month old! I turned my back for about 3 minutes and here he wiped the child safe/washable ink pad all over his face. He wanted to work with us but I restricted him to the washable inks, as you can see he is ruthless.


Here are some better photos of the steps. Here I stamped the images and let them dry. Be careful as the ink will slip a bit on the plastic creating some ink smudges.

Colored the images with permanent markers. The image is flipped because I wanted to try the coloring on the opposite side as the instructions were not really clear where to color. If we colored on the same side as the stamped image it seems to smear the black stamped image with the markers.

Into the oven and here is the results. Shrinky Dinks shrink to approximately 1/3rd of their original size and become 9 times thinker-per the website at http://www.shrinkydinks.com/. The images are real transparent and colorful when not laying on the brown paper.

This was such a fun project to do with my daughter and her friend and took me back to my childhood and made me realize that you don't have to do much to have fun. Use Shrinky Dinks as embellishments to your homemade cards, bookmarks or to use accents at your kids parties.

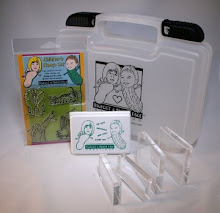
Kids crafts are so much fun and what a great way to use your clear rubber stamps. To purchase our product go to our storefront or check us out on Amazon. Never stop smiling and having fun. Happy Stamping!

Tuesday, August 25, 2009

Mini Pizza Box

These mini pizza boxes are great for gift cards and to put candy and treats into and it will even fit chocolate chip cookies. Make them for a birthday party or a holiday event. You will find this project very simple to put together, the hard part will be deciding on how to decorate it!

Cut a piece of of card stock 6" x 11". On the 6" side score at 1" and 5". Turn the card stock around and on the 11" side score at 1", 5", 6" and 10". Cut on the 11" side shown in red to create the flaps on your box.


Adhere the flaps to the inside of the box.


Decorate your box and fill it with goodies. You may want to decorate the box before you glue it together, as it may be easier especially if you are using embellishments. Have fun!


Here we used stamps from our Bigfoot & Pickle Face Creations Circus and Farm set. Have an idea on a project, feel free to comment! Thanks for visiting.

Monday, August 24, 2009

Pencil Holder for Back to School

This project is so quick and easy, in no time you can make a bunch in an hour. You can use this pencil holder for a gift idea at birthday parties, weddings or for just a quick gift. Put inside pencils, colored pencils or markers for a great gift idea. Having a wedding or baby shower, personalize the pencils for a great take home gift. Fun for kids also, as they like to give their teachers a gift too.

Cut a piece of card stock paper in half to measure 5-1/2" x 8-1/2". As shown in the picture below, score at 2-1/2 and 5" on the long side. Then score at the bottom at 1". Fold along the scored lines and then cut along the solid red lines as shown.

Use double sided tape to put your completed project together. Fold up the bottom and tape the smaller 1/2" side at the bottom and then run tape along the side and bottom and folder over the left piece to make a pocket.

Next, decorate and have fun.

We used clear rubber stamps from our Bigfoot & Pickle Face Collection along with our child safe/washable ink pad in black to complete the above holders. You don't need to do much to make something look great.

We welcome comments and suggestions, so feel free to leave them. Happy Monday and happy stamping.

Friday, August 21, 2009

How to make Rain Sticks using Paper towel tubes

This project is so simple and fun and the end result is the beautiful sound of rain. Kids love this project and it does not take a long time to do.

You will need the following supplies:
[1] piece of card stock cut to 6-1/2" x 11"
[1] empty paper towel tube [or cardboard wrapping paper tube or mailing tube]
Aluminum foil
1 to 2 cups of rice ~ depending on the size of your rain stick
[2] squares of card stock cut at 4" in size
[2] rubber bands
Supplies to decorate


Decorate the 6-1/2" x 11" piece of card stock with stamps, stickers, markers or crayons. On this project we used stamps from our Bigfoot & Pickle Face Creations Farm set and stamped the images with the child safe/washable ink pad in black. Put glue on the back side of the decorated 6-1/2" x 11" card stock and use double sided tape along the edge and then roll the card stock onto the paper town tube.

Seal off one end of the tube with the rubber band and the 4" square of card stock. Cut the aluminum foil to slightly larger then the length of your cardboard tube. Twist it and form into a snaky-spiral shape and insert into the cardboard tube. Pour the rice into the open end of the tube and then seal off that end with the remaining rubber band and 4" square of card stock.

Turn to listen to the sounds of the rain.

Rubber stamping is fun, so have some fun today and start stamping. Visit our website to find out more about us and our storefront to purchase clear rubber stamping supplies for your kids craft projects. Feel free to leave a comment and don't forget to subscribe to our feed or to our updates via email. Thanks for stopping by!

Thursday, August 6, 2009

How to make a Corner Bookmark

Corner bookmarks are so easy to make and are also functional. This is a great project to do with your child and they can use their very own bookmark for the book they are currently reading. Wonderful for gifts or a just because I love you and does not take a long time to do, so involve your child as they will have lots of fun.

Out of card stock in the same color (1) 5" x 5" and (1) 3-1/2" x 3-1/2" square. Then out of coordinating paper or card stock cut (2) 3-1/4" x 3-1/4" and (2) 2-3/4" x 2-3/4" squares. I did the base a nice rose color card stock and then a stripe paper and a deep purple for the layers.

Take the 5" x 5" square and make a mark with the pencil at the 2-1/2" point on all 4 sides.

Then at a diagonal, score all 4 sides where you marked at the 2-1/2"~ if you don't have a scorer, then fold the paper. You will be folding 2 adjacent corners and cutting off the other two corners where you scored. See below photo's for an example.


Set the above pieces aside and take your (1) 3-1/2" x 3-1/2", (1) 3-1/4" x 3-1/4" and (1) 2-3/4" x 2-3/4" sheets. Put them diagonal in your paper cutter and make them into a triangle. If you do not have a paper cutter, fold in half and cut with the scissors.

Layer your pieces and adhere to each other with double sided tape or with a glue stick. The triangles you will place on the triangle side of the bookmark and the square on the opposite side.


Here is what the finished bookmark should look like.


Now it is time to decorate! I cut out a piece of white card stock paper at 2-1/4" x 2-1/4" and then took another piece of scrap card stock and stamped the fish stamp from our Bigfoot & Pickle Face Creations Fun with Fish collection SKU#FSH06 and used our child safe/washable ink stamp pad in black. Color in the images and cut to fit your bookmark.

Here is the finished product, front and back.


Have fun and use your imagination when decorating. You can use foam tape and bring the image up higher, or use glitter glue to give it a sparkly look. Have fun with your kid crafts with your child and have fun stamping.

Visit our store for these products and our website to find out more about us. Thanks for stopping by and have fun stamping! All of our products are made in the USA.

Wednesday, August 5, 2009

Treat Bag decorated with clear rubber stamps

This cute little treat bag is very simple to make and is great for any season or theme. Fill it with candy for Halloween, knick knacks for a birthday party or a gift card for that special event. It is 2" wide so lots of room for all sorts of goodies. This project is fun for the whole family and a very simple project to do with your children. Kids crafts are fun and educational for your children, especially when your are doing it with them.

The completed bag size is 3-1/2" x 2-3/4" x 2". Print the template below onto card stock. Right click and save it to your computer and open to print. It should fit on a 8-1/2" x 11" paper. You want to use card stock as it will give the bag some durability. If you have problems printing the template, email me and I and send it to you as a pdf file.
Cut out the template on the solid lines and score on the dotted lines. Once I cut out the image I used the decorative scissors on the top of the bag to give it a fancy look.

You will decorate the bag before you glue it together, as it is easier to do so when it is flat. I cut out 2 pieces of card stock sizes 2-1/2" x 3" to put on the front and back of the bag. You can also use a decorative paper to jazz up your bag. I stamped clear stamp image onto white card stock and colored it in. It is wise to use washable markers, crayons or pencils when working with children. Here I used from our Bigfoot & Pickle Face Creations Fun with Fish set SKU#FSH05 and our child safe/washable ink stamp pad in black.

Cut out your images and decorate your bag. This is the time to use your imagination. Put a nice saying on your bag to complete the look. I used foam tape to make my images stand out. You will want to do this so that when you thread the ribbon through the front of the bag it goes under your image and saying. Use double sided sticky tape or a glue stick to glue your bag together. Make sure that you fold in the side flap and then at the bottom the square flaps go on the inside. Cut a 15" piece of ribbon and tie it around your bag and knot at the top once you put your treat inside.

If you have any questions or suggestions, don't hesitate to comment or email me. Visit our storefront to purchase any of the Bigfoot & Pickle Face Creations clear rubber stamps line or our website to find out more about us. The fish set used above is included in our Clear rubber stamp Starter Kit~Fun with Fish SKU#FSH05. Strong man is from our circus set SKU#CRC02.

Clear rubber stamping is fun, especially when you include your children. Many of your projects may look like a child did it, that makes it much more special to receive it as a gift. Happy Stamping!