
Cut your paper [card stock]. I have a paper trimmer that you can change the blade out to use as a scorer. It cost me $9.99 at the local craft store. You will use the paper cutter/scorer a lot if you intend on following my blog ~ so you will get your money's worth out of purchasing this type of item if don't have one already.
Your main card size is 10-1/2" x 4-1/4"; you should get 2 out of 1 piece of paper [use card stock]. If you want to make the card wider, then adjust the 4 1/4" to your chosen size. So cut your paper to 10-1/2" x 4-1/4" [keep the 4" x 1" strip].
Score in the landscape position at 1-1/4", 2-1/2", 4-1/4", 6" and 8-1/4". Fold your paper like a stair step starting at the 1-1/4" score line ~ see photo.

Next cut the paper for your stair steps. I used scrap paper from prior projects and the left over piece from this project. You will need the following sizes for your steps: 4" x 2", 4" x 1-1/2" and 4" x 1". You can use any type of paper and it does not need to be card stock.

Next step is the fun part, decorating. Glue or use double sided tape on the pieces you cut for the "steps" and place them on your card. I printed out on the computer a note for the first step that said "Thank You for the Gift". This could be any message you want to say. You can also use stamps that have a saying you like. If using stamps then stamp the wording before adhering the piece to the step in case you have an error. If you know how to emboss you can also emboss the words [but as this blog is for kids projects, we don't do embossing as it is too complicated at this point in our life].
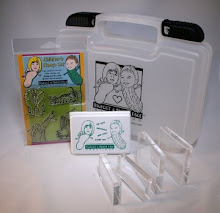
Here we used the stamps from our Bigfoot & Pickle Face line ~ SKU#CRC01 which is also located in our starter kit SKU#KITCRC01. Start to decorate, use your imagination. I used paper from a prior painting project and incorporated it into the cards.


Last step is to place your message ~ and this you can do on the back of the card. I put a separate piece of paper on the back to write our note. The majority of the paper I used was from scraps, so whenever you do a project -- keep those scraps. The images were stamped with our child safe/washable ink pad in black and then colored with washable markers, crayons and pencils. Everything we do is washable.

This card will fit in a 3-1/2" x 5" envelop ~ as long as you don't make your back image too high.
As I am behind in providing you with some crafty ideas, I will attempt to get another project up on this blog this week.
To find out more about us, visit our website at http://www.bigfootandpicklefacecreations.com and to shop go to our storefront at http://stores.bigfootandpickleface.com/StoreFront.bok


No comments:
Post a Comment