Thursday, January 28, 2010

Template Half Page and Full Page ~ Circus Tent

Here are the templates for the Circus Tent I promised. If you need a smaller size, see the post I did on January 25, 2010 HERE.

Here is my Circus Tent that I did on the 2 per half sheet. I did not get a chance to finish it, but when I showed the kids my example many of them wanted to copy it. Bigfoot & Pickle Face provides a wonderful selection of circus stamps on our online store, visit there for ideas and to purchase.


Remember, these are my designs so if you are using them and publishing them please give me credit. They are a copyright 2010 of Bigfoot & Pickle Face.


2 per page Circus Tent


Full Page Circus Tent


Happy stamping and have a great week. Make sure you include the kids when crafting, you will be amazed at what they will create.

Wednesday, January 27, 2010

Template Half Page and Full Page ~ Fish Bowl

Here is the templates of the fish bowl on a full page and 2 on a full page. Have fun rubber stamping and coloring, and if you need rubber stamps stop by our store HERE.

Here is my sample of the fish bowl using the 2 on a full page template.


Full Page Fish Bowl


Two per page Fish Bowl

Remember, these are my designs so if you are using them and publishing them please give me credit. They are a copyright 2010 of Bigfoot & Pickle Face.

Happy Stamping and creating! Tomorrow look for the enlarged Circus Tent Template.

Tuesday, January 26, 2010

January 2010 Sale on rubber stamp sets

Go to Bigfoot & Pickle Face's storefront HERE and enter the following code JAN20SALE for 20% off all products [excluding starter kits and child safe/washable ink pads]. Sale ends January 31st, 2010; so place your order soon.

Feel free to pass this information to your family and friends. Happy Stamping!

P.S. Tomorrow I will post another template for you to print.

Templates Half Page and Full Page ~ Barn

Here are two barn templates enlarged to fit on one full page or 2 per page. I posted on January 25, 2010, smaller images of the barn to fit 4 on a page. I will do a post later in the week for both the Circus Tent and Fish Bowl. Use these images with your rubber stamps, and tell a story or use it as a coloring book page.

Here is a sample of the barn that I did using our farm friends clear rubber stamps. This is a kid friendly project, so make sure they are included in on the fun.

2 Barns per page


Full Page Barn


You can purchase Bigfoot & Pickle Face rubber stamps on our storefront HERE. Have fun stamping with the kids and thanks for stopping by.

Remember, these are my designs so if you are using them and publishing them please give me credit. They are a copyright 2010 of Bigfoot & Pickle Face. We would love to see what you create, so feel free to link your artwork or email to me and I will post for you.


P.S. you may ask how I colored in the checkered bull or sheep. Crayola has these wonderful markers called "Color Switchers" which you can read all about HERE. They were lots of fun and I am sure some of the kids that were doing the crafts at my table this past weekend purchased them. Parents, you will love playing with the too.

Monday, January 25, 2010

Small Templates ~ Barn, Fish Bowl and Circus Tent

I was asked by a friend if I could entertain the kids that came into their grocery store during their grand opening by having some type of kids craft project using Bigfoot & Pickle Face rubber stamps.

I designed some templates for them to stamp on to, then they colored them in and put them onto the bookmark with a glue stick. I did not have my camera along to capture them rubber stamping and coloring, so here are my samples.

Some if the kids were reluctant at first to sit down, but once they started stamping and coloring there was no stopping them. Although I was not there to sell, one mom did buy my display sample of the Farm Friends stamping kit and another clear stamp set to compliment the kit. She emailed me and said that her kids rubber stamped all day Sunday and today [no school today].

So below are the templates that I used for the bookmarks. Right click and save them to a folder on your computer, print out, cut and decorate. As for the backing for the bookmark, I just cut a piece of card stock that was a bit larger then the image and put a decorative top border to give it color. I then cut at and angle to give it a "tag" look. I was going to hole punch and put decorative string or ribbon through the hole but did not have enough supplies that coordinated with it. Instead I used a punch that I had laying around and glued it to the top part of the tag. Use your imagination and what you have handy and you will be amazed at what you can create.

Barn Template


Circus Tent Template


Fish Bowl Template

I tried to put as many images on a sheet as to not waste paper. I printed it on white card stock, but regular white printer paper should work. The templates are a copyright 2010 of Bigfoot & Pickle Face, I just did not want to print it on the template and have it print out on your final copy. Feel free to use the templates, just give me the courtesy and credit of mentioning my name if you are going to post it somewhere on the web. The fish bowl is sold as a stamp on Bigfoot & Pickle Face storefront, if you would like to purchase it as a stamp. You will need a 4" x 4" acrylic block for the stamp.

Later this week I will post additional templates with the images enlarged, so you can add additional rubber stamps to the scene.

Thanks for stopping by and following my blog [or if you stumbled upon it ~ yeah!], feel free to pass this on to your family and friends and happy stamping!

P.S. the kids artwork looked quite a bit better then mine, as they don't worry about the little things that us adults do.

Friday, January 15, 2010

Matchbox Project #3

This week I have posted about making and decorating matchboxes and use them as treat holders for rewards or as a just thinking of you. They make great party favors and does not take a lot of candy to fill them, just the right amount for children or adults. Prepare in advance and make some of these with your child for Valentine's Day. I was told this morning by Bigfoot that she would like to share her "heart shape candies with sayings" on them with me because she did not like them; she is going to offer them to her family. You will be a winner with the treats you put in your matchbox, what kid or adult does not like chocolate! Making the matchbox does take time, but if you do all the cutting and gluing you can have your child work on the decorating. If your child is big enough, have them help you with the cutting and gluing.

This matchbox project I used the same matchbox bottom template that I used in the prior blog, click HERE to get the template. You will be able to fit 2 Hershey Nuggets in each bottom. I designed an outside case that looks like a box for playing cards that will fit the matchbox bottom. Remember to do a practice one before you do it on your good paper.

The outside wrapper dimensions are 4 1/2" x 4 3/4". Cut a piece of card stock at 4 1/2" x 4 3/4". Score on the 4 1/2" side at 1/2", 2", 2 1/2", and 4". On the 4 3/4" side score at 1", 1 1/2", 3 3/4" and 4 1/4". See diagram below as a guide. You can fold at your scores so that it is easier to cut. Cut out the squares as show below with the blue. You will need to cut at 2 spots shown in blue below [2 straight lines] to make some flap for folding into the box. Look on the next picture of one cut out. As always, if you have any questions feel free to email me directly. Once you do the first one the rest are real easy.


This photo shows the templates cut out and scored and then glued together. You will notice on the wrap that I glued the flap on the outside instead of on the inside of the box. If you glue it on the inside of the box, your matchbox bottom may have a hard time fitting into the box. Just cut a decorative piece of paper big enough to fit on the outside of the box and glue it on.

Once you are done gluing the boxes together then have fun decorating. The wrap around the Hershey Nuggets is a piece of paper 1" x 3 1/4". I used a hole punch and punched some holes to put onto the top of the Nuggets to decorate the paper a little bit. NOTE: You will need to make a tag to put into the matchbox bottom drawer so that it is easier to pull out of the box. I took a piece of ribbon and used double sided sticky tape to hold the ribbon into the box. I closed the box flap using a glue dot; you could always wrap a ribbon around it to keep it shut.
Have fun with this projects and include the children when doing kids crafts. I find that Bigfoot does much better at some artwork then I do and that she can think more freely. If you plan in advance, you can make a bunch of these for Valentines Day and the kids and adults will love you!
Include rubber stamps in your project and if using solid paper, stamp on the outside of the paper before gluing it together to give it a wonderful design. Visit Bigfoot & Pickle Face's store and see our fun rubber stamps, add some to your collection. Have a great weekend and since Bigfoot slept through the night without waking us, I will have to make her a matchbox treat for doing great. Happy stamping!

Wednesday, January 13, 2010

Matchbox Project #2

This project is wonderful for little rewards, as a party favor, or just because I Love You. Bigfoot has been getting up several times in the night to have us cover her, so we are trying to convince her to do it herself. You would think it would be the 2 year old waking us, but it is the 4 1/2 year old. She loves to find things under her pillow the next morning, so what a great way to reward her for not waking us in the night.

Teachers, use this idea for rewarding students for a great job done!

Parents, assist your child by cutting out the matchbox and putting it together. Have them decorate the outside wrap and assist in putting the wrap around the candy. I used Hershey Nuggets and the matchbox was designed to fit 2 of them, yummy yum yum. According to the Hershey's package there are about 36 nuggets per bag, you can do about 18 of these matchboxes per bag.

Let's get started. I used the same matchbox template from the prior blog so click here if you need it.

Print the template on card stock and cut on the solid lines, score on the dashes. Fold and glue accordingly to make the bottom of the matchbox. Cut another piece of card stock to wrap around the matchbox bottom at 2 1/4" x 4 1/2". Score on the long side at 1/2", 2", 2 1/2" and 4". Fold and glue the outside wrap. The paper for the wrap around the candy is 1" x 3 1/4"; wrap and glue at the bottom.

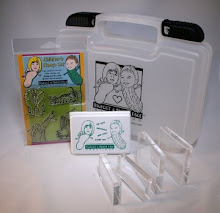
Have fun and decorate with your children. Here is the completed matchbox. I guess I could have used this as a great job in math, but at 4 1/2 years we don't have that subject yet.

I realize this project did not have any rubber stamping, but definitely incorporate it into your project along with sticker, yarn or confetti ~ whatever you have laying around the house. Have fun with your children, as they will keep you young. Thank you for visiting, Bigfoot & Pickle Face really appreciates any comments or suggestions you may have. Feel free to add your link of your matchbox project you have completed. Have a great week!

Matchbox Card Project #1

This week I am going to focus on use of homemade matchbox and show you what fun it can be when used as a party favor or as a card. An adult will need to do the printing and cutting out of the matchbox bottom, but do involve your child in the gluing and decorating of the matchbox card.

This is a great idea for Valentine's Day, and you will be giving away candy the kids will actually eat [or an adult will sneak].

I have modified the matchbox template to come up with one that will fit (2) Hershey Nuggets. I put 4 to a page so that you can mass produce and get the most use out of your paper. Keep the scraps as you may find a use for them like wrapping the outside of the nuggets. Cutting out the matchbox was the most lengthy part of this project, but if you print a bunch in advance and cut them out while you are watching TV it will go quicker.

Print out the template below on card stock [if you are having issues with the image, email me and I can send it to you as a pdf.].
Cut along the solid lines and score along the dotted lines. Fold and glue each box.

Cut a 3 1/2" x 5 5/8" in a coordinating piece of card stock. Score along the long side [5 5/8" side] at 2 1/2" and 3 1/8".

Place the 2 matchbox bottoms inside the card and mark a spot for a hole punch, do the same to the top of the card.

Use a hole punch and punch a hole where you marked. Glue the 2 matchbox bottoms together and then glue them to the inside of the card, align it to your scored area.

Cut out [4] 1" x 3 1/4" strips to use for the wrapper around the Hershey Nuggets. Wrap the paper around the candy and glue together on the bottom.

Put a blank piece of paper on the inside of your card for your notes and decorate the outside of your card depending on the event. I used a piece of ribbon to close the card. The ribbon was from an old helium balloon and when I get rid of the balloon I keep the ribbon ~ recycle.

This project is both yummy and fun. According to the Hershey Nuggets bags that I purchased, a serving is 4 candies for 200 calories, and there are about 9 servings per bag. This treat card will be the hit of any party and the receiver will love it. Have fun and spend time with your children making kids crafts, it will bring out the kid in you!

I used the Bigfoot & Pickle Face image from our Farm Set, click here to view all of our clear stamps. Go out and make your own creation and provide your link in your comments so we can all enjoy what you have done. Happy crafting and have fun stamping!