Showing posts with label rubber stamp. Show all posts

Monday, February 8, 2010

Valentine Folded Heart Card

I love this idea of a Valentine's Day card. Very simple and easy to make, and it does not have to be perfect so your kids can help you with this project. Since Patti at "Creations by Patti" blog has a wonderful tutorial on how to do this project, you can click HERE.

This is my card following her instructions. I did modify and used a ribbon to go around the card and stuck my flower to the ribbon. I did cheat and glued my inside card on the heart and then scored around around the card; I was off a just bit, but the ribbon and flower hide my mistake :). I did use tissue paper for the flower [it was pretty wrinkled] and it worked better if I folded the tissue paper in half and then used the punch. I then put the flower together with a pink brad and dipped and rubbed it on out Bigfoot & Pickle Face child safe/washable ink pad in the color pink.

Card Folded

Inside of the card.


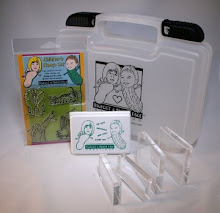
I found this stamp at the local craft store at 1/2 off the clearance so I paid $1.88 [original $7.50]. The stamp is by Great Impressions and I really like it because it reminds me of Bigfoot & Pickle Face when they are playing nice.


Here is Bigfoot showing off her barrettes.

Happy stamping and creative crafting with the kids.

Thursday, January 28, 2010

Template Half Page and Full Page ~ Circus Tent

Here are the templates for the Circus Tent I promised. If you need a smaller size, see the post I did on January 25, 2010 HERE.

Here is my Circus Tent that I did on the 2 per half sheet. I did not get a chance to finish it, but when I showed the kids my example many of them wanted to copy it. Bigfoot & Pickle Face provides a wonderful selection of circus stamps on our online store, visit there for ideas and to purchase.


Remember, these are my designs so if you are using them and publishing them please give me credit. They are a copyright 2010 of Bigfoot & Pickle Face.


2 per page Circus Tent


Full Page Circus Tent


Happy stamping and have a great week. Make sure you include the kids when crafting, you will be amazed at what they will create.

Tuesday, January 26, 2010

Templates Half Page and Full Page ~ Barn

Here are two barn templates enlarged to fit on one full page or 2 per page. I posted on January 25, 2010, smaller images of the barn to fit 4 on a page. I will do a post later in the week for both the Circus Tent and Fish Bowl. Use these images with your rubber stamps, and tell a story or use it as a coloring book page.

Here is a sample of the barn that I did using our farm friends clear rubber stamps. This is a kid friendly project, so make sure they are included in on the fun.

2 Barns per page


Full Page Barn


You can purchase Bigfoot & Pickle Face rubber stamps on our storefront HERE. Have fun stamping with the kids and thanks for stopping by.

Remember, these are my designs so if you are using them and publishing them please give me credit. They are a copyright 2010 of Bigfoot & Pickle Face. We would love to see what you create, so feel free to link your artwork or email to me and I will post for you.


P.S. you may ask how I colored in the checkered bull or sheep. Crayola has these wonderful markers called "Color Switchers" which you can read all about HERE. They were lots of fun and I am sure some of the kids that were doing the crafts at my table this past weekend purchased them. Parents, you will love playing with the too.

Wednesday, December 16, 2009

Treat Holder using a piece of 6 x 6 Square paper

This treat holder is quick and easy to make. Great for the holidays or for a party as favors. Here is both the top view and the side view. Takes about 5 minutes to make. What a great little gift for the classroom or for a get together. Have your kids help, they will have fun folding the paper and decorating.
Fill with goodies, I used Hershey Kisses.

Take a piece of 6" x 6" card stock paper and score at 2" and 4" on both sides. Score on an angle in each of the 4 corners only. See picture for example.

Hole punch on each corner.

Decorate and thread through the holes a piece of ribbon or string to close your treat holder. Put a tag on the ribbon if you want to personalize it.

Here is the top view of the treat holder empty.

Fill with goodies.

Here is the gingerbread man treat holder. I used some leftover art from my daughter to decorate the 2 sides.

Here is the snowman treat holder.

Use rubber stamps to decorate before putting together. I used on the tag the fish from our Bigfoot & Pickle Face rubber stamp collection. Our childsafe/washable ink pad in black was used for this project.

Enjoy and have a happy and safe holiday season. Visit our website to find out more about us, or go to our store for your Holiday shopping.

Wednesday, December 2, 2009

Milk Carton Template

It is has been a while since I posted, not sure where the time went. Here is a fun project and great to do for this time of year. You can also use them for party favors for any type of event, just decorate it to accommodate what you are celebrating. Use them as Advent containers, what a wonderful surprise for the kids. Kids can do this project with some help from an adult. Have them help you decorate the container and then you put in the goodies.

There are all different templates out there for Milk Cartons and I had to modify them to accommodate my needs. There are two that I like, one is a square box and bigger then the other. Remember to always try out anything on scrap paper before you use your good paper. Print out the template information below and follow the instructions. If you have any questions, please email me.

Here is the first template listed above, cut out and scored.

Here is the second template cut out and scored.

Glue the side flap and then glue the bottom flaps. Practice first on white card stock or an any paper you don't mind ruining. Here I used patterned paper, but you can definitely use any solid card stock or thick craft paper. I did not glue the top part of the milk carton.

I decorated the boxes after they were assembled because I had patterned paper. If you use solid paper and want to stamp or put any embellishments, then decorate before putting the cartons together as it would be hard to stamp on the carton already assembled.

This box I decorated with the rubber stamp from our Bigfoot & Pickle Face circus collection and used our child safe/washable ink stamp pads. Create a theme by using different stamps, the kids will just love receiving them and finding out what is inside.

Milk Cartons are great for packing up small items and also great for gift cards. Put in some Hershey Kisses for an added bonus. Use these Milk Cartons to pack teacher's gifts, they will love receiving something personally made by their student.

Tomorrow I will post steps for a Milk Carton carrier made from card stock to match the Milk Cartons. Thanks for stopping by and visit our storefront for your rubber stamp needs and go to our website to find out more about us.

Tattoo Markers are great stocking stuffers for this time of the year and the kids LOVE them. They are washable and dry quickly once applied. Tip: have clean dry skin on the area you are going to color.